
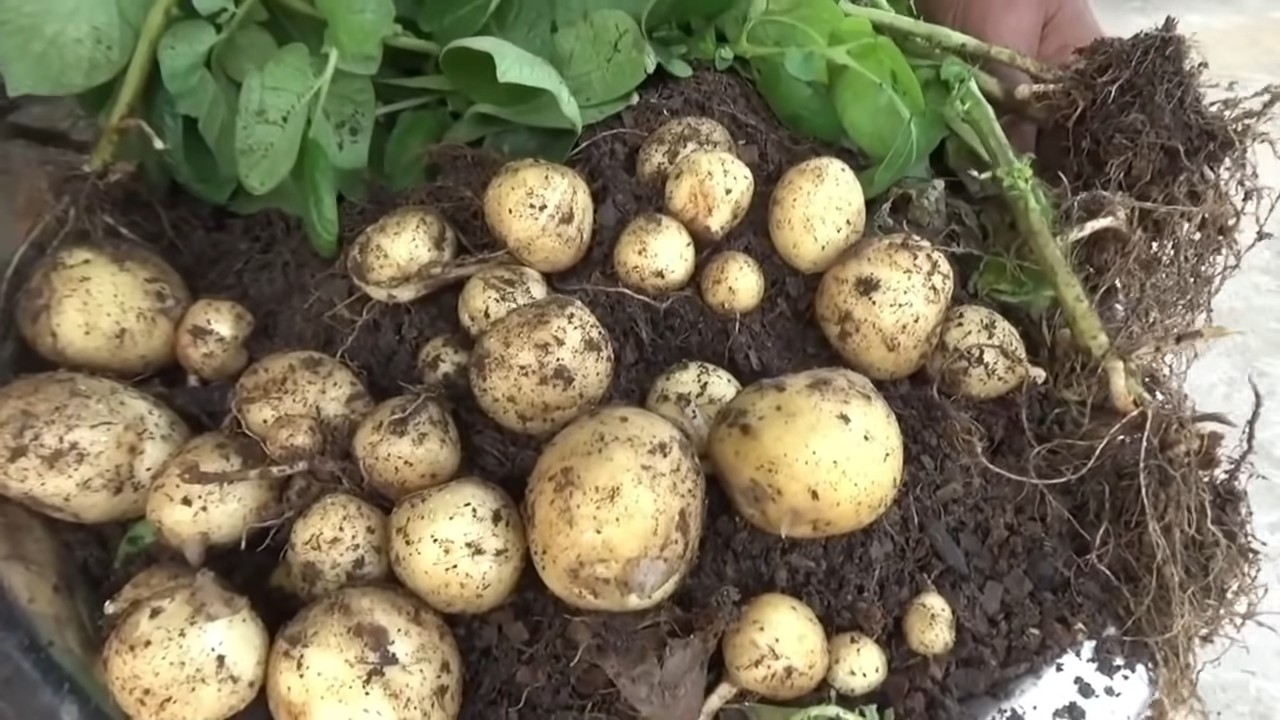
Grow Potatoes Fast? Absolutely! Imagine harvesting a bounty of delicious, homegrown potatoes weeks before your neighbors even think about planting theirs. Sounds like a dream, right? Well, it doesn’t have to be! This isn’t just another gardening article; it’s your express ticket to potato paradise, filled with simple, effective DIY tricks and hacks that will have you enjoying fresh, earthy spuds in record time.
Potatoes have been a staple food for centuries, with their cultivation dating back to the Inca civilization in the Andes Mountains. They’re not just nutritious; they’re incredibly versatile in the kitchen. But let’s be honest, waiting for them to mature can feel like an eternity. That’s where these DIY secrets come in.
In today’s fast-paced world, who has time to wait? We all crave instant gratification, and that includes our gardens! Whether you’re a seasoned gardener or just starting out, these tips will help you grow potatoes fast and efficiently, maximizing your yield and minimizing your waiting time. I’m going to share some of my favorite, tried-and-true methods that will have you digging up your own homegrown potatoes sooner than you ever thought possible. Get ready to roll up your sleeves and let’s get growing!
Grow Potatoes Like a Pro: My Foolproof DIY Method for a Bountiful Harvest
Okay, potato lovers, gather ’round! I’m about to share my secret weapon for growing potatoes faster and getting a seriously impressive harvest. Forget waiting forever – with this method, you’ll be digging up delicious spuds in no time. This isn’t your grandma’s potato patch (unless your grandma is a super-secret potato-growing ninja!).
Choosing the Right Potatoes and Preparing Them
Before we even think about dirt, we need to talk about seed potatoes. These aren’t just any potatoes you find at the grocery store. They’re specifically grown for planting and are disease-free.
* Seed Potato Selection: Look for certified seed potatoes at your local garden center or online. Choose varieties that are known for their early maturity and suitability to your climate. I personally love Yukon Gold for its creamy texture and quick growth. Red potatoes are also a great choice.
* Size Matters (Sort Of): Smaller seed potatoes (about the size of a chicken egg) can be planted whole. Larger ones should be cut into pieces, each with at least one or two “eyes” (those little buds that sprout).
* The Curing Process: This is crucial! After cutting your seed potatoes, let them sit in a cool, dry place for a few days (3-5 days is ideal). This allows the cut surfaces to callous over, preventing rot when you plant them. Think of it like a little protective bandage for your potato pieces.
Preparing the Planting Site: Location, Location, Location!
Potatoes are sun worshippers, so finding the right spot is key.
* Sunlight is Your Friend: Choose a location that gets at least 6-8 hours of direct sunlight per day. The more sun, the bigger and better your potato harvest will be.
* Soil Matters: Potatoes prefer well-drained, loose soil. Heavy clay soil can lead to misshapen potatoes and rot. If you have clay soil, amend it with plenty of compost, aged manure, or peat moss to improve drainage and aeration.
* Soil pH: Aim for a soil pH between 6.0 and 6.8. You can test your soil pH with a simple soil testing kit from your local garden center.
* Clear the Area: Remove any rocks, weeds, or debris from the planting area. Potatoes need room to grow, and weeds will compete for nutrients and sunlight.
The “Hilling” Method: My Secret Weapon
This is where the magic happens! The hilling method involves gradually covering the potato plants with soil as they grow. This encourages the formation of more potatoes along the stem.
* What is Hilling?: Hilling is the process of mounding soil around the base of the potato plants as they grow. This encourages the plant to produce more potatoes along the buried stem.
* Why Hill?: Hilling provides several benefits:
* Increases potato yield.
* Protects developing potatoes from sunlight (which can turn them green and bitter).
* Improves drainage around the roots.
* Provides support for the growing plants.
Step-by-Step Planting and Hilling Guide
Alright, let’s get our hands dirty!
1. Dig the Trenches: Dig trenches that are about 6-8 inches deep and 2-3 feet apart. The spacing is important to give the plants enough room to grow and allow for easy hilling.
2. Plant the Seed Potatoes: Place the seed potatoes (cut side down, if applicable) in the trenches, spacing them about 12 inches apart.
3. Cover with Soil: Cover the seed potatoes with about 4 inches of soil. Don’t completely fill the trench – we’ll be adding more soil later.
4. Water Thoroughly: Water the planted area well to settle the soil and encourage sprouting.
5. Wait for Sprouts: Be patient! It may take a week or two for the potato plants to emerge from the soil.
6. First Hilling: When the plants are about 6-8 inches tall, it’s time for the first hilling. Use a hoe or shovel to gently pull soil from the sides of the trench and mound it around the base of the plants, leaving only the top few inches of the plant exposed.
7. Second Hilling (and Beyond): As the plants continue to grow, repeat the hilling process every 2-3 weeks, or whenever the plants are about 6-8 inches taller. Continue to mound soil around the base of the plants, always leaving the top few inches exposed. You can also use straw or mulch to help retain moisture and suppress weeds.
8. Watering: Potatoes need consistent moisture, especially during tuber formation. Water deeply whenever the soil feels dry to the touch. Avoid overwatering, which can lead to rot.
9. Fertilizing (Optional): If your soil is poor, you can fertilize your potato plants with a balanced fertilizer (e.g., 10-10-10) a few weeks after planting. Follow the instructions on the fertilizer package. I personally prefer using compost tea for a more natural approach.
Dealing with Pests and Diseases
Even with the best care, potatoes can sometimes be affected by pests and diseases. Here’s what to watch out for:
* Potato Beetles: These pesky beetles can defoliate your potato plants. Handpick them off the plants or use an organic insecticide like neem oil.
* Aphids: These tiny insects can suck the sap from your potato plants. Spray them with insecticidal soap or neem oil.
* Early Blight: This fungal disease causes dark spots on the leaves. Prevent it by providing good air circulation and avoiding overhead watering. If you see signs of early blight, spray the plants with a fungicide.
* Late Blight: This is a more serious fungal disease that can quickly destroy your potato crop. It’s more common in cool, wet weather. Prevent it by planting disease-resistant varieties and providing good air circulation. If you see signs of late blight, spray the plants with a fungicide immediately.
Harvest Time!
The moment we’ve all been waiting for!
* When to Harvest: You can start harvesting “new potatoes” (small, tender potatoes) about 2-3 weeks after the plants flower. For larger, mature potatoes, wait until the foliage starts to die back.
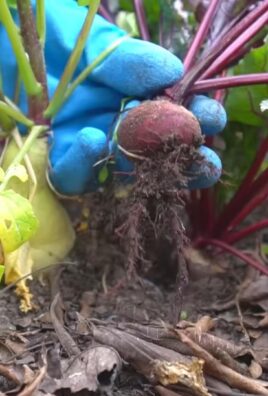
* How to Harvest: Gently dig around the base of the plants with a garden fork or shovel. Be careful not to damage the potatoes.
* Curing and Storage: After harvesting, let the potatoes dry in a cool, dry place for a few days to cure. This helps to toughen the skin and prevent rot. Store the cured potatoes in a cool, dark, and well-ventilated place. They should last for several months.
Extra Tips for Potato-Growing Success
* Crop Rotation: Don’t plant potatoes in the same location year after year. Rotate your crops to prevent soilborne diseases and pests.
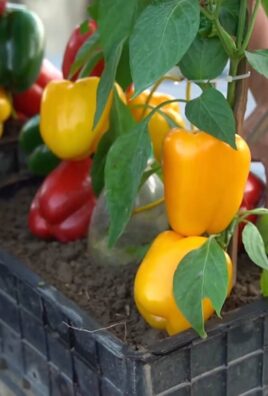
* Companion Planting: Plant potatoes with beneficial companion plants like beans, cabbage, and marigolds. These plants can help to deter pests and improve soil health.
* Mulching: Mulch around your potato plants with straw, hay, or wood chips to help retain moisture, suppress weeds, and regulate soil temperature.
* Experiment: Don’t be afraid to experiment with different potato varieties and growing techniques to find what works best for you.
Troubleshooting Common Potato Problems
* Green Potatoes: Potatoes that are exposed to sunlight will turn green and produce a toxic substance called solanine. Avoid this by hilling the plants properly and storing the potatoes in a dark place.
* Scabby Potatoes: Potato scab is a common soilborne disease that causes rough, scabby patches on the potato skin. Prevent it by maintaining a slightly acidic soil pH and avoiding overwatering.
* Hollow Heart: This condition causes a hollow center in the potato. It’s usually caused by inconsistent watering or nutrient deficiencies. Provide consistent moisture and fertilize your plants properly to prevent hollow heart.
My Favorite Potato Recipes
Now that you’ve grown your own amazing potatoes, it’s time to enjoy them! Here are a few of my favorite potato recipes:
* Roasted Garlic Potatoes: Toss potatoes with olive oil, garlic, rosemary, and salt, then roast until golden brown and crispy.
* Creamy Potato Soup: Simmer potatoes with broth, onions, and garlic, then blend until smooth and creamy.
* Potato Salad: Boil potatoes until tender, then toss with mayonnaise, mustard, celery, onions, and hard-boiled eggs.
* Homemade French Fries: Cut potatoes into fries, then fry them in hot oil until golden brown and crispy.
Growing potatoes can be incredibly rewarding. With a little bit of planning and effort, you can enjoy a bountiful harvest of delicious, homegrown potatoes. So get out there, get your hands dirty, and start growing!
Conclusion
So, there you have it! Growing potatoes fast isn’t just a pipe dream; it’s an achievable reality with this simple, yet effective DIY trick. We’ve walked you through the process, highlighting how you can significantly shorten the time it takes to harvest your own delicious, homegrown potatoes. Forget waiting an eternity for those spuds to mature – with a little planning and this clever technique, you’ll be enjoying fresh, flavorful potatoes in a fraction of the usual time.
Why is this a must-try? Because it empowers you to take control of your food source, offering a rewarding connection to the earth and providing you with the freshest possible ingredients. Imagine the satisfaction of digging up your own potatoes, knowing exactly where they came from and how they were grown. Plus, it’s a fantastic way to reduce your reliance on store-bought produce, saving you money and minimizing your environmental impact.
But the benefits don’t stop there. This method also allows for greater flexibility and experimentation. Feel free to adapt the technique to suit your specific needs and preferences. For example, if you’re short on space, consider using grow bags or containers instead of planting directly in the ground. This is especially useful for urban gardeners or those with limited outdoor areas. You can also experiment with different potato varieties to discover your favorites. Try growing Yukon Golds for their creamy texture, Russets for their versatility, or fingerling potatoes for their unique shape and flavor.
Another variation to consider is the use of different types of fertilizer. While we’ve recommended a balanced fertilizer, you can tailor your feeding schedule to the specific needs of your potato plants. For example, during the early stages of growth, a fertilizer with a higher nitrogen content can promote vigorous foliage development. Later on, a fertilizer with a higher phosphorus and potassium content can encourage tuber formation.
Don’t be afraid to get creative and personalize the process to your liking. The key is to provide your potato plants with the right conditions – ample sunlight, well-drained soil, and consistent moisture – and to monitor their progress closely.
We are confident that this DIY trick will revolutionize your potato-growing experience. It’s a game-changer for both novice and experienced gardeners alike. So, what are you waiting for? Grab your seed potatoes, gather your supplies, and get ready to embark on a rewarding journey of growing potatoes fast.
We encourage you to try this method and share your results with us! We’d love to hear about your successes, challenges, and any variations you’ve tried. Share your photos and stories on social media using [Your Hashtag Here] and let’s build a community of potato-growing enthusiasts. Your experiences can inspire others to try this technique and discover the joy of growing their own food. Happy gardening!
Frequently Asked Questions (FAQ)
What kind of potatoes work best with this method?
While this method works well with most potato varieties, some tend to thrive more than others. Early-season varieties like Yukon Gold and Red Norland are particularly well-suited because they naturally mature faster. However, you can certainly use mid-season or late-season varieties as well; just be aware that they may still take a bit longer to mature, even with this accelerated growing technique. Experimenting with different varieties is part of the fun! Consider your local climate and soil conditions when selecting your seed potatoes.
How often should I water my potato plants?
Watering is crucial for successful potato growth. The frequency depends on your climate and soil type. Generally, you should aim to keep the soil consistently moist, but not waterlogged. A good rule of thumb is to water deeply whenever the top inch of soil feels dry to the touch. During hot, dry periods, you may need to water more frequently. Conversely, during rainy periods, you may need to reduce watering to prevent root rot. Monitor your plants closely and adjust your watering schedule accordingly. Using a moisture meter can be helpful in determining the soil’s moisture level.
What type of soil is best for growing potatoes?
Potatoes prefer well-drained, loose soil that is rich in organic matter. Sandy loam soil is ideal because it allows for good drainage and aeration, which are essential for healthy tuber development. Avoid heavy clay soils, as they can become waterlogged and compact, hindering root growth. If you have clay soil, amend it with plenty of compost, well-rotted manure, or other organic materials to improve drainage and aeration. A slightly acidic soil pH (around 6.0 to 6.5) is also optimal for potato growth.
How much sunlight do potato plants need?
Potato plants need at least six to eight hours of direct sunlight per day to thrive. Sunlight is essential for photosynthesis, the process by which plants convert sunlight into energy. Insufficient sunlight can result in weak, spindly plants and reduced tuber production. Choose a planting location that receives ample sunlight throughout the day. If you live in a particularly hot climate, some afternoon shade may be beneficial to prevent the plants from overheating.
What kind of fertilizer should I use?
A balanced fertilizer with an NPK ratio of 10-10-10 or 14-14-14 is generally a good choice for potatoes. However, you can also tailor your fertilizer to the specific needs of your plants. During the early stages of growth, a fertilizer with a higher nitrogen content can promote vigorous foliage development. Later on, a fertilizer with a higher phosphorus and potassium content can encourage tuber formation. Avoid over-fertilizing, as this can lead to excessive foliage growth at the expense of tuber development. Follow the instructions on the fertilizer package carefully.
How do I protect my potato plants from pests and diseases?
Potatoes are susceptible to a variety of pests and diseases, including potato beetles, aphids, blight, and scab. To minimize the risk of problems, practice good garden hygiene. Remove any weeds or debris that could harbor pests or diseases. Rotate your crops each year to prevent the buildup of soilborne pathogens. Inspect your plants regularly for signs of pests or diseases and take action promptly. Organic pest control methods, such as insecticidal soap or neem oil, can be effective against many common pests. For diseases, consider using copper-based fungicides or other appropriate treatments.
When do I know when my potatoes are ready to harvest?
The timing of harvest depends on the variety of potato you are growing and your desired size. For “new potatoes,” which are small and tender, you can begin harvesting when the plants start to flower. Simply dig around the base of the plant and carefully remove a few potatoes. For larger, more mature potatoes, wait until the foliage begins to die back. This indicates that the tubers have reached their full size and are ready to be harvested. Dig up the entire plant and carefully remove the potatoes from the soil.
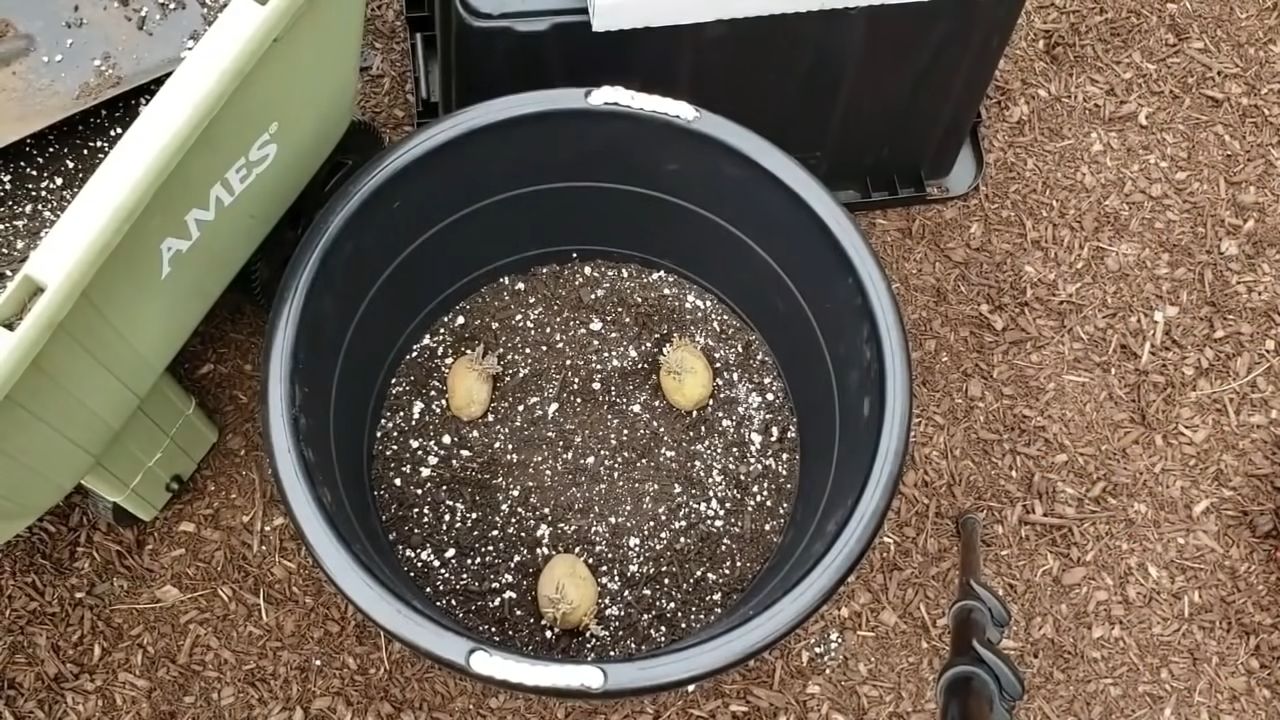
Can I grow potatoes in containers?
Yes, growing potatoes in containers is a great option for those with limited space or poor soil conditions. Choose a large container (at least 10 gallons) with drainage holes. Fill the container with a well-draining potting mix and plant your seed potatoes as described in the instructions. As the plants grow, gradually add more soil to the container, burying the stems to encourage more tuber formation. Water regularly and fertilize as needed. Container-grown potatoes tend to mature a bit faster than those grown in the ground.
What do I do with green potatoes? Are they safe to eat?
Green potatoes contain solanine, a toxic compound that can cause nausea, vomiting, and diarrhea. Avoid eating green potatoes. If a potato has only a small amount of green skin, you can carefully cut away the green portion before cooking. However, if the potato is extensively green, it’s best to discard it. To prevent potatoes from turning green, store them in a cool, dark, and dry place.
How do I store my harvested potatoes?
Store your harvested potatoes in a cool, dark, and dry place with good ventilation. A root cellar is ideal, but a basement or garage can also work. Avoid storing potatoes near apples or other fruits that produce ethylene gas, as this can cause them to sprout prematurely. Properly stored potatoes can last for several months.
Leave a Comment