
Bean Sprouts DIY Home Growing: Ever dreamt of having fresh, crunchy bean sprouts readily available, right at your fingertips? Imagine skipping those grocery store trips and enjoying the satisfaction of growing your own healthy sprouts, bursting with flavor and nutrients. Well, dream no more! This article is your ultimate guide to mastering the art of bean sprouts DIY home growing, even if you’ve never gardened a day in your life.
The practice of sprouting beans has ancient roots, dating back thousands of years in Asian cultures. They were not only a staple food source but also held symbolic significance, representing growth, prosperity, and new beginnings. Today, the appeal of growing your own bean sprouts lies in its simplicity, sustainability, and the incredible health benefits they offer.
Let’s face it, we’re all looking for ways to eat healthier and save money. Store-bought bean sprouts can be expensive and sometimes lack that fresh, vibrant taste. With our easy-to-follow bean sprouts DIY home growing guide, you’ll learn how to cultivate these nutritional powerhouses in your own kitchen, using minimal space and equipment. Plus, you’ll have the peace of mind knowing exactly where your food comes from and what’s in it. So, get ready to embark on a fun and rewarding journey into the world of home sprouting!
Regrow Celery from Kitchen Scraps: A Beginner’s Guide
Hey there, fellow plant enthusiasts! Ever find yourself tossing out the base of your celery stalk after chopping it up for a delicious soup or salad? Well, stop right there! Did you know you can actually regrow celery from that very scrap? It’s a super easy and rewarding DIY project, perfect for beginners and a fantastic way to reduce food waste. I’m going to walk you through the whole process, step-by-step, so you can have your own little celery patch growing right in your kitchen.
What You’ll Need
Before we dive in, let’s gather our supplies. The good news is, you probably already have most of these things lying around:
* A celery stalk base (about 2 inches from the bottom, with the root end intact).
* A shallow dish or bowl.
* Water (tap water is fine).
* A sunny windowsill or well-lit area.
* Potting soil.
* A pot or container (at least 6 inches in diameter).
* A spray bottle (optional, but helpful for misting).
Phase 1: Rooting Your Celery Base
This is where the magic begins! We’re going to coax those dormant roots back to life.
1. Prepare the Celery Base: Take your celery stalk base and give it a gentle rinse under cool water. This will remove any dirt or debris. Don’t worry about removing the outer stalks; we’ll deal with those later.
2. Place in Water: Fill your shallow dish or bowl with about an inch of water. Place the celery base, cut-side up, in the water. Make sure the bottom of the base is submerged, but the top remains dry. You don’t want the whole thing to rot!
3. Find a Sunny Spot: Place the dish on a sunny windowsill or in a well-lit area. Celery needs plenty of light to thrive, even in this early stage.
4. Change the Water Regularly: This is crucial! Change the water every 1-2 days to prevent bacteria growth and keep the water fresh. This will encourage root development.
5. Observe and Wait: Now comes the patience part. Over the next few days, you should start to see small roots emerging from the bottom of the celery base. You might also notice new green shoots sprouting from the top. This is a great sign! It means your celery is happy and ready to grow. This process usually takes about 5-7 days, but it can vary depending on the temperature and light conditions.
Phase 2: Planting Your Celery
Once your celery has developed a good network of roots (about an inch or two long) and has some healthy green growth, it’s time to move it to a pot with soil.
1. Prepare Your Pot: Choose a pot or container that’s at least 6 inches in diameter and has drainage holes. Fill it with good-quality potting soil. I like to use a mix that’s rich in organic matter.
2. Make a Hole: Use your finger or a small trowel to create a hole in the center of the soil, large enough to accommodate the celery base and its roots.
3. Carefully Transplant: Gently remove the celery base from the water. Be careful not to damage the delicate roots. Place the celery base in the hole, making sure the top of the base is level with the soil surface.
4. Fill and Pat: Fill the hole with soil, gently patting it down around the celery base. You want to make sure the celery is secure and the roots are well covered.
5. Water Thoroughly: Water the soil thoroughly until water drains out of the drainage holes. This will help settle the soil and ensure the roots are properly hydrated.
Phase 3: Caring for Your Growing Celery
Now that your celery is planted, it’s time to provide it with the care it needs to thrive.
1. Sunlight: Celery loves sunlight! Place your pot in a sunny location where it will receive at least 6 hours of direct sunlight per day. If you don’t have a sunny spot, you can supplement with a grow light.
2. Watering: Keep the soil consistently moist, but not soggy. Water when the top inch of soil feels dry to the touch. Avoid overwatering, as this can lead to root rot. I usually water mine every 2-3 days, depending on the weather.
3. Fertilizing: Celery is a heavy feeder, so it benefits from regular fertilization. Use a balanced liquid fertilizer every 2-3 weeks. Follow the instructions on the fertilizer package.
4. Misting: Celery also appreciates humidity. Mist the leaves with water every few days, especially if you live in a dry climate. This will help keep the leaves healthy and prevent them from drying out.
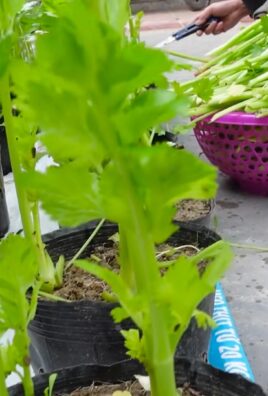
5. Harvesting: You can start harvesting your celery when the stalks are about 6-8 inches tall. Simply cut off the outer stalks as needed, leaving the inner stalks to continue growing. This will allow you to harvest celery continuously over a period of time.
Troubleshooting Tips
Even with the best care, you might encounter a few challenges along the way. Here are some common problems and how to fix them:
* Yellowing Leaves: This could be a sign of overwatering, underwatering, or nutrient deficiency. Check the soil moisture and adjust your watering schedule accordingly. If the soil is dry, water more frequently. If the soil is soggy, allow it to dry out before watering again. You can also try fertilizing with a balanced fertilizer.
* Slow Growth: This could be due to insufficient sunlight, poor soil, or lack of nutrients. Make sure your celery is getting enough sunlight and that the soil is rich in organic matter. Fertilize regularly with a balanced fertilizer.
* Root Rot: This is usually caused by overwatering. Make sure your pot has drainage holes and that you’re not watering too frequently. If you suspect root rot, you can try repotting the celery in fresh soil.
* Pests: Celery can be susceptible to pests like aphids and spider mites. Inspect your plant regularly for signs of pests and treat them with an appropriate insecticide or organic pest control method. I like to use neem oil for a natural solution.
Extra Tips for Success
* Choose a Healthy Celery Stalk: Start with a fresh, firm celery stalk base. Avoid stalks that are wilted, discolored, or have signs of rot.
* Be Patient: Regrowing celery takes time and patience. Don’t get discouraged if you don’t see results immediately. Just keep providing it with the care it needs, and it will eventually thrive.
* Experiment with Different Varieties: There are many different varieties of celery, each with its own unique flavor and characteristics. Try regrowing different varieties to see which ones you like best.
* Enjoy the Process: Regrowing celery is a fun and rewarding experience. Enjoy the process of watching your plant grow and learn from any mistakes you make along the way.
I hope this guide has inspired you to try regrowing celery from kitchen scraps. It’s a simple, sustainable, and rewarding way to add fresh produce to your diet. Happy gardening!
Conclusion
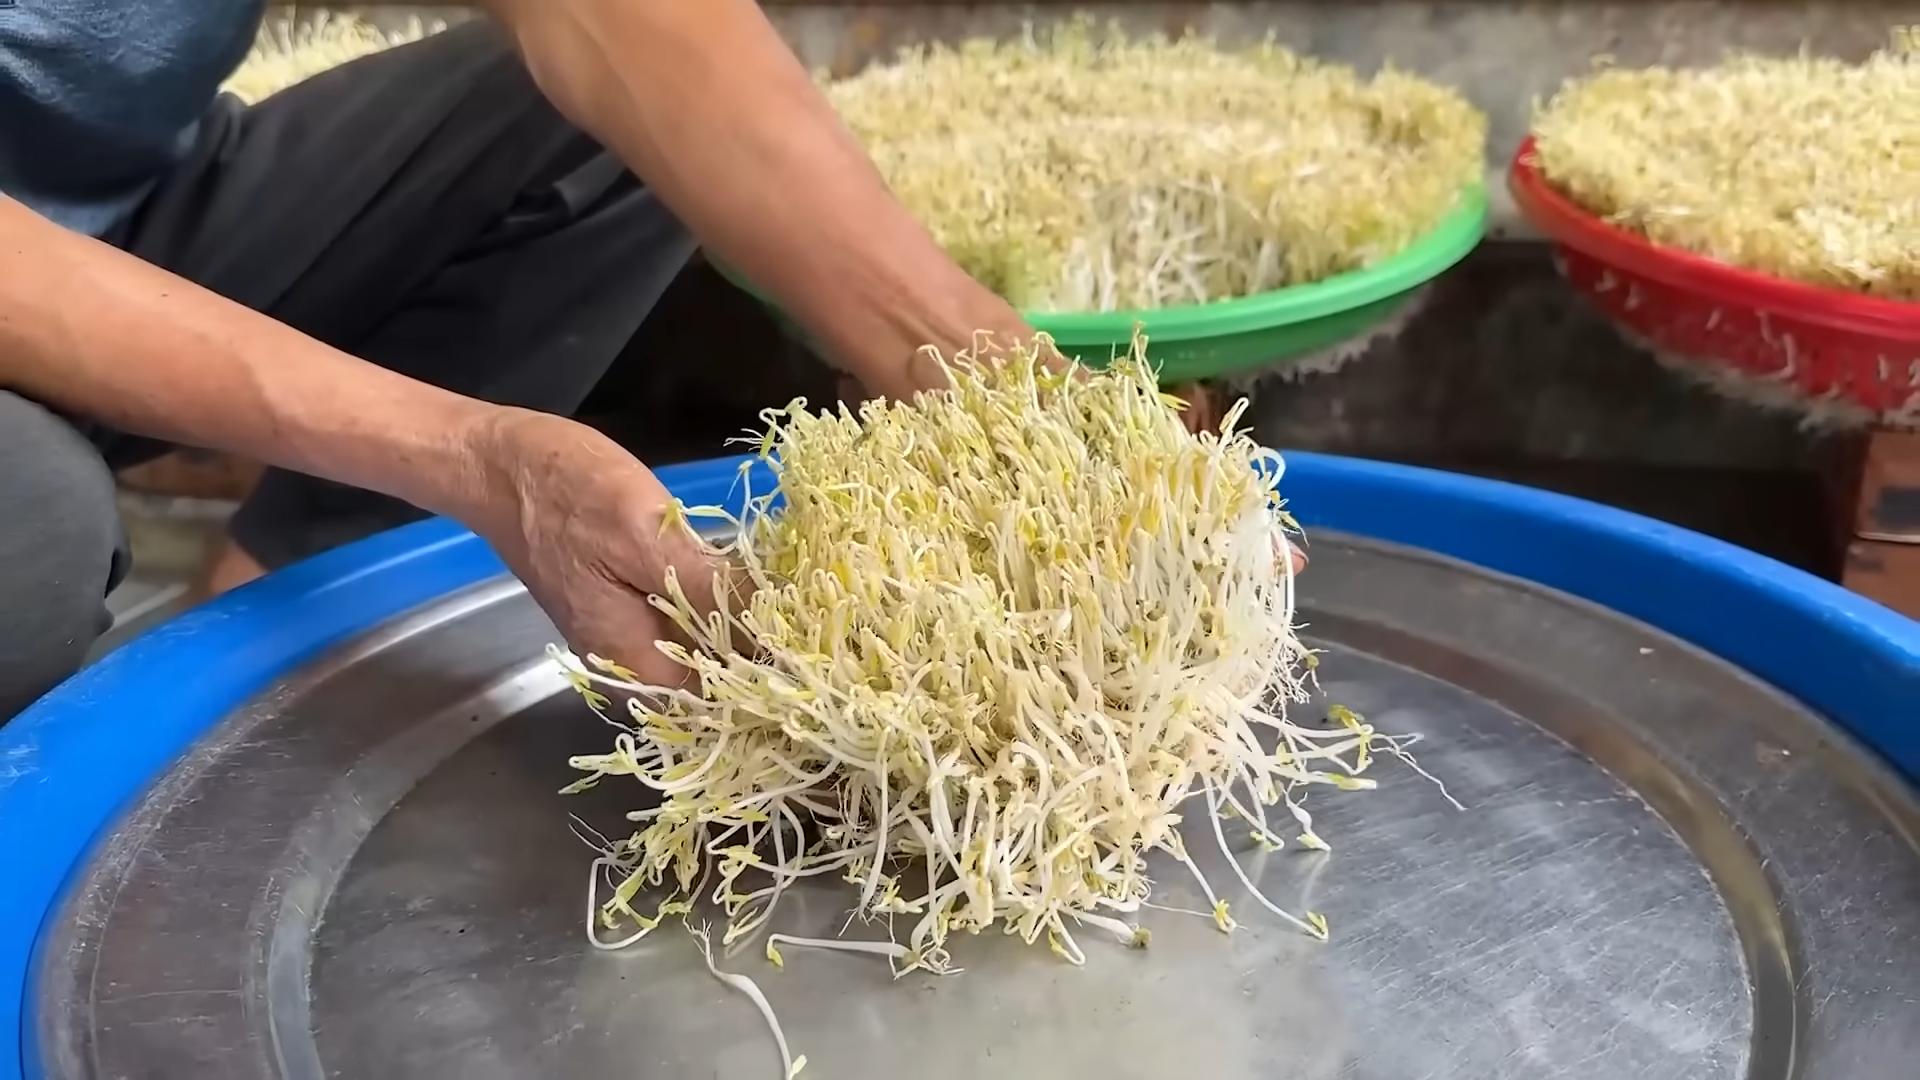
So, there you have it! Growing your own bean sprouts at home is not only incredibly easy and cost-effective, but it also provides you with a constant supply of fresh, crunchy goodness right at your fingertips. Forget those limp, sad-looking sprouts from the grocery store – with this simple DIY method, you’ll be enjoying vibrant, flavorful bean sprouts in just a few days.
Why is this a must-try? Because it empowers you to take control of your food source, ensuring you’re consuming the freshest, most nutritious ingredients possible. You know exactly what’s going into your sprouts – no hidden chemicals or preservatives, just pure, wholesome goodness. Plus, it’s a fantastic way to reduce your reliance on store-bought produce and minimize your environmental impact.
But the benefits don’t stop there. Growing bean sprouts is also a surprisingly therapeutic and rewarding experience. Watching those tiny seeds transform into edible sprouts is a mini-miracle that can bring a touch of joy to your daily routine. It’s a great project for kids, too, teaching them about the wonders of nature and the importance of healthy eating.
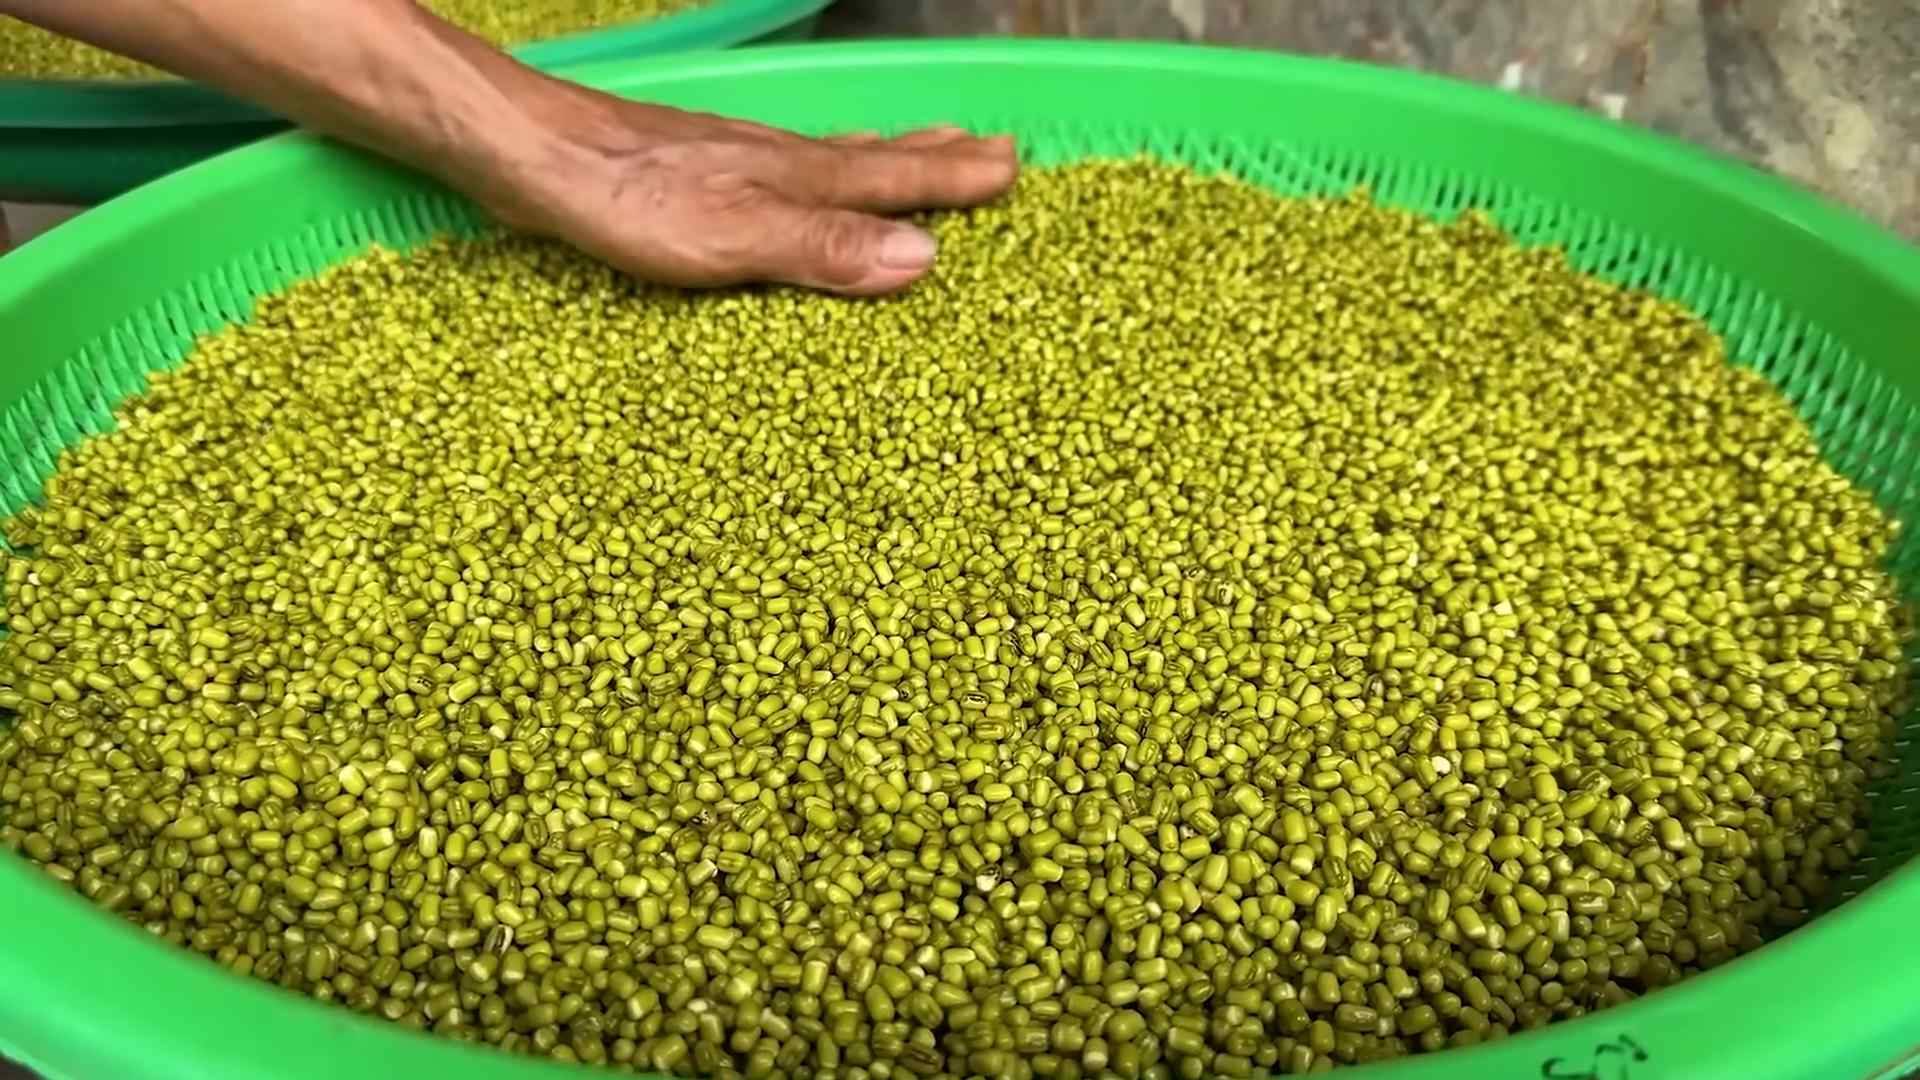
Ready to get creative? There are plenty of variations you can try to customize your bean sprout growing experience. Experiment with different types of beans, such as mung beans (the most common), adzuki beans, or even lentils. Each variety will offer a slightly different flavor and texture. You can also play around with the sprouting container. While a mason jar works perfectly well, you could also use a sprouting bag or a multi-tiered sprouting system for larger yields.
Another fun variation is to add a touch of flavor during the rinsing process. Try adding a splash of lemon juice or a pinch of sea salt to the water to enhance the taste of your sprouts. You can even experiment with adding a few drops of your favorite hot sauce for a spicy kick.
And don’t forget about the culinary possibilities! Bean sprouts are incredibly versatile and can be used in a wide range of dishes. Add them to salads, sandwiches, stir-fries, soups, and spring rolls for a boost of flavor and nutrition. They’re also a great addition to smoothies and juices.
The key to successful bean sprout growing is consistency. Make sure to rinse your sprouts regularly and provide them with adequate drainage to prevent mold growth. With a little bit of care and attention, you’ll be rewarded with a bountiful harvest of delicious, homemade bean sprouts.
So, what are you waiting for? Gather your supplies, follow the simple steps outlined in this article, and embark on your bean sprout growing adventure today! We’re confident that you’ll be amazed at how easy and rewarding it is to grow your own fresh, healthy bean sprouts at home.
We encourage you to try this DIY trick and share your experience with us! Let us know what types of beans you used, what variations you tried, and what delicious dishes you created with your homemade sprouts. Share your photos and stories on social media using [Your Hashtag] – we can’t wait to see what you come up with! Happy sprouting!
Frequently Asked Questions (FAQ)
What types of beans are best for sprouting?
Mung beans are the most commonly used and easiest to sprout. They have a mild, slightly sweet flavor and a crisp texture. Other good options include adzuki beans, lentils, and even chickpeas, although chickpeas require a longer soaking and sprouting time. Avoid using kidney beans, as they contain toxins that are only destroyed by thorough cooking. Always use beans specifically intended for sprouting, as these are less likely to have been treated with chemicals.
How long does it take to grow bean sprouts?
Generally, it takes between 3 to 5 days to grow bean sprouts to a desirable length. The exact time will depend on the type of bean, the temperature, and the humidity. Warmer temperatures will speed up the sprouting process, while cooler temperatures will slow it down.
How often should I rinse the bean sprouts?
Rinsing is crucial to prevent mold growth and keep your sprouts fresh. You should rinse your bean sprouts at least twice a day, preferably three times, with cool, clean water. Make sure to drain the water thoroughly after each rinsing.
What if my bean sprouts start to smell bad?
A bad smell is a sign of bacterial growth or mold. If your bean sprouts start to smell unpleasant, it’s best to discard them. To prevent this, ensure you’re rinsing them frequently and draining them well. Also, make sure your sprouting container is clean and sanitized before each use.
Can I grow bean sprouts in direct sunlight?
No, direct sunlight can damage your bean sprouts and cause them to become bitter. Bean sprouts prefer a dark, cool environment. Keep them in a cupboard, pantry, or other dark place during the sprouting process.
How do I store bean sprouts?
Once your bean sprouts have reached your desired length, you can store them in the refrigerator for up to a week. Rinse them thoroughly and pat them dry before storing them in an airtight container lined with a paper towel. The paper towel will help absorb excess moisture and keep the sprouts fresh.
Are bean sprouts safe to eat raw?
While most commercially grown bean sprouts are safe to eat raw, there is a small risk of bacterial contamination. To minimize this risk, always buy bean sprouts from a reputable source and wash them thoroughly before eating. If you’re concerned about food safety, you can cook your bean sprouts lightly before eating them.
Can I use tap water to grow bean sprouts?
Yes, you can use tap water to grow bean sprouts, as long as your tap water is safe to drink. If you’re concerned about the quality of your tap water, you can use filtered water instead.
My bean sprouts are growing mold. What should I do?
If you see mold growing on your bean sprouts, it’s best to discard them. Mold can be harmful to your health. To prevent mold growth, make sure you’re rinsing your sprouts frequently and draining them well. Also, ensure your sprouting container is clean and sanitized before each use. Proper air circulation is also important.
Can I regrow bean sprouts from the same batch of beans?
No, you cannot regrow bean sprouts from the same batch of beans. Once the beans have sprouted, they have used up their energy reserves. You will need to start with a fresh batch of beans each time.
Are there any health benefits to eating bean sprouts?
Yes, bean sprouts are a good source of vitamins, minerals, and fiber. They are low in calories and fat and are a good source of protein. They also contain antioxidants, which can help protect your body against damage from free radicals. Incorporating bean sprouts into your diet can contribute to overall health and well-being.
What can I do with the leftover bean sprout hulls?
Don’t throw away those hulls! They can be added to your compost pile, used as mulch in your garden, or even fed to chickens (if you have them). They are a great source of nutrients for your plants.
Can I grow bean sprouts without a sprouting jar?
Yes, you can use other containers like a colander lined with cheesecloth or a sprouting bag. The key is to ensure proper drainage and air circulation.
How do I know when my bean sprouts are ready to harvest?
Your bean sprouts are ready to harvest when they have reached your desired length and have developed small roots. The leaves should be small and green. Taste one to make sure it has the desired crunch and flavor.
Leave a Comment