
DIY Floor Shine Mix: Are you tired of dull, lifeless floors that just don’t seem to sparkle, no matter how much you scrub? I know the feeling! You’re not alone. For generations, keeping floors clean and gleaming has been a source of pride in homes around the world. From ancient Roman mosaics meticulously polished with beeswax to the modern-day quest for the perfect shine, the desire for beautiful floors is deeply ingrained in our culture.
But let’s face it, commercial floor cleaners can be expensive and often filled with harsh chemicals that you might not want around your family or pets. That’s where the magic of a DIY Floor Shine Mix comes in! This isn’t just about saving money; it’s about creating a healthier, more sustainable home environment. I’m going to share a simple, effective recipe that uses ingredients you probably already have in your pantry.
Imagine walking into your home and being greeted by floors so radiant, they reflect the light and instantly brighten your mood. This DIY trick will not only save you money but also give you the satisfaction of knowing exactly what you’re using to clean your home. Get ready to ditch those store-bought cleaners and unlock the secret to truly dazzling floors!
DIY Floor Shine Mix: Revive Your Floors with Natural Ingredients!
Hey there, fellow DIY enthusiasts! Are your floors looking a little dull and lifeless? Do you cringe every time you see a smudge or a scuff mark? Well, fret no more! I’m here to share my go-to recipe for a DIY floor shine mix that will have your floors gleaming like new – and all without harsh chemicals or breaking the bank. This mix is perfect for most sealed hard floors, including hardwood, tile, laminate, and linoleum. However, always test in an inconspicuous area first to ensure compatibility. Let’s get started!
What You’ll Need: The Ingredients for a Sparkling Clean
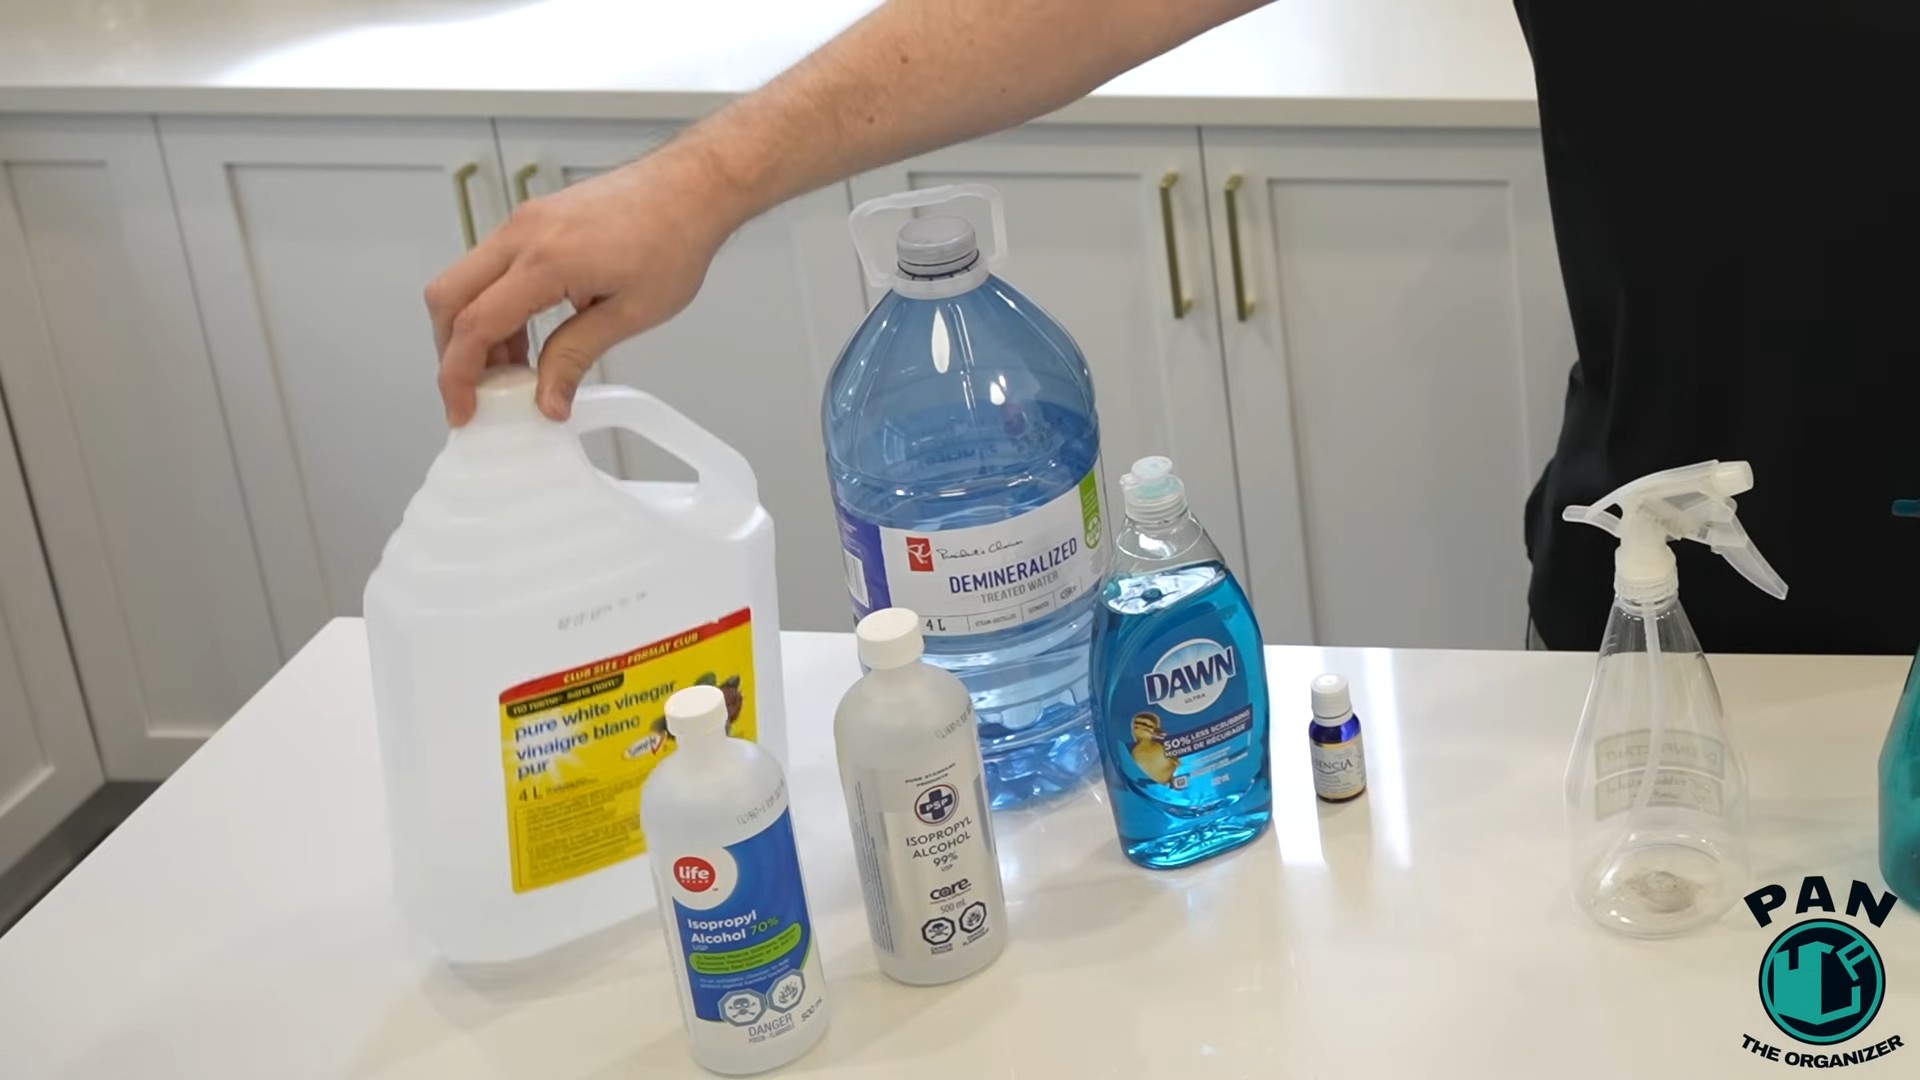
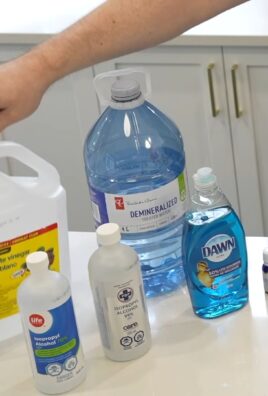
Before we dive into the mixing process, let’s gather our supplies. This recipe uses simple, natural ingredients that you probably already have in your pantry!
* **White Vinegar (1/2 cup):** Vinegar is a fantastic natural cleaner and disinfectant. Its acidity helps to cut through grime and grease, leaving your floors sparkling.
* **Rubbing Alcohol (1/4 cup):** This helps the mixture dry quickly and prevents streaks. It also acts as a disinfectant.
* **Liquid Dish Soap (1 teaspoon):** Just a tiny bit of dish soap is enough to help lift dirt and grime. Choose a mild, pH-neutral dish soap to avoid damaging your floors.
* **Essential Oil (10-15 drops):** This is optional, but I love adding essential oils for a pleasant scent. Lemon, lavender, and tea tree oil are all great choices. Tea tree oil also has antibacterial properties.
* **Warm Water (1 gallon):** This is the base of our cleaning solution.
* **Spray Bottle (optional):** If you prefer to spray your floors, you’ll need a spray bottle.
* **Bucket:** For mixing the solution and dipping your mop.
* **Mop:** Choose a mop that’s appropriate for your floor type. Microfiber mops are great for most surfaces.
* **Soft Cloths:** For spot cleaning and drying.
Mixing the Magic: Step-by-Step Instructions
Now that we have all our ingredients and supplies, let’s get to the fun part – mixing the floor shine solution!
1. **Prepare Your Bucket:** Fill your bucket with one gallon of warm water. Make sure the water isn’t too hot, as this could damage some floor types. Lukewarm water is ideal.
2. **Add the Vinegar:** Pour in 1/2 cup of white vinegar. The vinegar will help to break down dirt and grime, leaving your floors clean and shiny.
3. **Incorporate the Rubbing Alcohol:** Add 1/4 cup of rubbing alcohol. This will help the solution dry quickly and prevent streaks.
4. **Introduce the Dish Soap:** Add just 1 teaspoon of liquid dish soap. Remember, a little goes a long way! Too much soap can leave a residue on your floors.
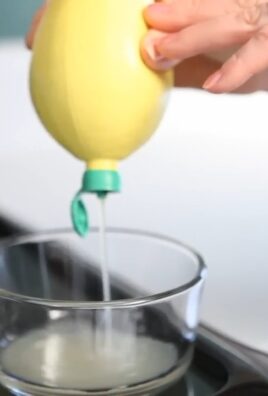
5. **Scent with Essential Oils (Optional):** If you’re using essential oils, add 10-15 drops of your favorite scent. I personally love lemon for its fresh, clean smell.
6. **Mix Thoroughly:** Stir the mixture well to ensure that all the ingredients are properly combined.
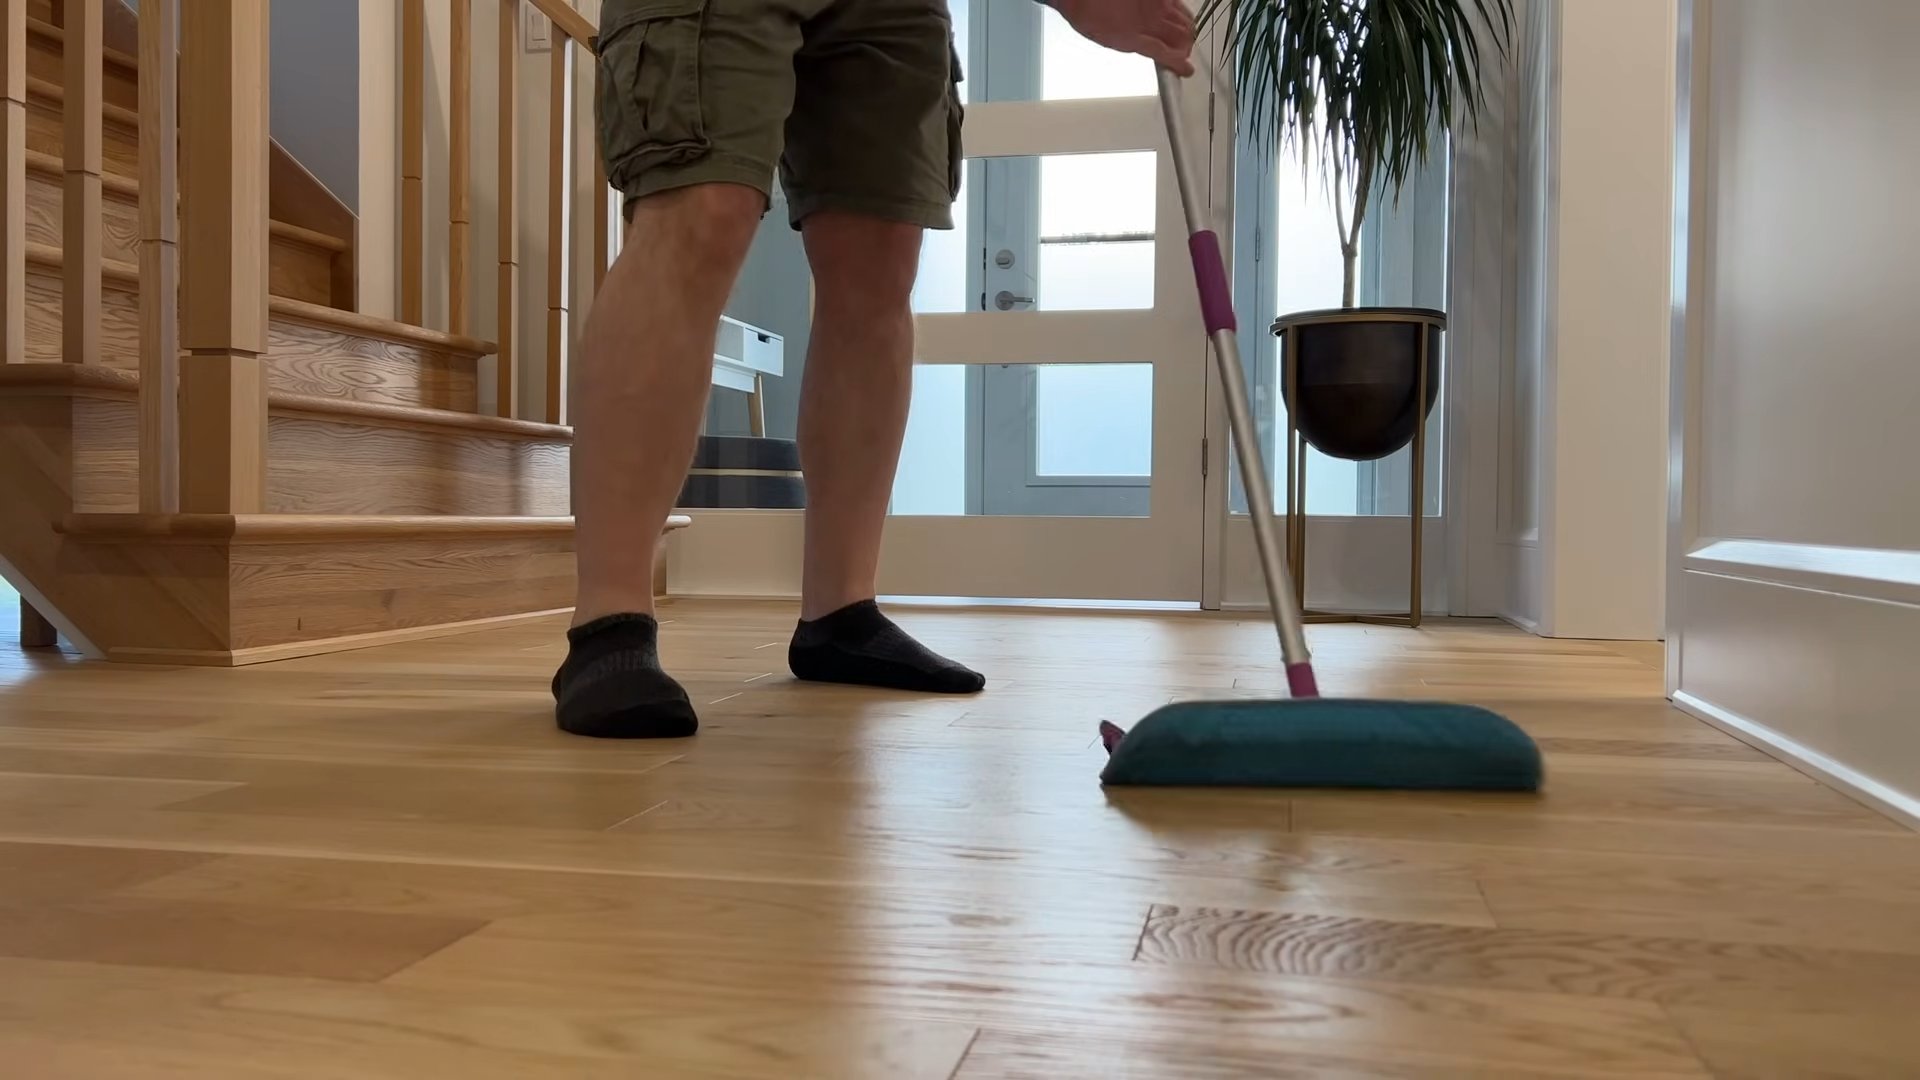
Shine Time: Cleaning Your Floors Like a Pro
Now that you have your amazing DIY floor shine mix, it’s time to put it to work!
1. **Prepare Your Floors:** Before you start mopping, sweep or vacuum your floors thoroughly to remove any loose dirt, dust, or debris. This will prevent you from just pushing the dirt around with your mop.
2. **Dip and Wring:** Dip your mop into the bucket of cleaning solution, making sure to saturate the mop head. Then, wring out the mop thoroughly to remove excess water. You want the mop to be damp, not soaking wet.
3. **Mop in Sections:** Mop your floors in sections, overlapping each stroke slightly. This will ensure that you cover the entire surface.
4. **Rinse Your Mop:** As you mop, rinse your mop frequently in a separate bucket of clean water. This will prevent you from spreading dirty water around your floors. Wring out the mop well after rinsing.
5. **Dry with a Cloth (Optional):** For extra shine and to prevent water spots, you can dry your floors with a clean, soft cloth after mopping. This is especially helpful for hardwood floors.
6. **Spot Clean as Needed:** For stubborn stains or spills, you can use a spray bottle filled with the cleaning solution to spot clean. Spray the affected area, let it sit for a few seconds, and then wipe it clean with a soft cloth.
Extra Tips and Tricks for Floor-Shining Success
Here are a few extra tips and tricks to help you achieve the best possible results:
* **Test in an Inconspicuous Area:** Before you clean your entire floor, test the cleaning solution in an inconspicuous area, such as under a rug or in a closet, to make sure it doesn’t damage the finish.
* **Avoid Over-Wetting:** Over-wetting your floors can damage them, especially hardwood floors. Make sure to wring out your mop thoroughly before mopping.
* **Use the Right Mop:** Choose a mop that’s appropriate for your floor type. Microfiber mops are great for most surfaces, but sponge mops are better for tile floors.
* **Change Your Water Frequently:** Change the water in your bucket frequently to prevent you from spreading dirty water around your floors.
* **Ventilate the Room:** Open windows or turn on a fan to ventilate the room while you’re cleaning. This will help the floors dry faster and prevent the buildup of odors.
* **Don’t Use on Unsealed Floors:** This mixture is designed for sealed floors. Using it on unsealed floors could cause damage.
* **Adjust the Recipe:** Feel free to adjust the recipe to suit your needs. If you have particularly dirty floors, you can add a little more vinegar. If you have sensitive floors, you can reduce the amount of vinegar.
* **Frequency:** How often you clean your floors depends on your lifestyle and the amount of traffic they receive. Generally, mopping once a week is sufficient for most households.
Troubleshooting: Addressing Common Floor Cleaning Issues
Even with the best DIY floor shine mix, you might encounter a few common floor cleaning issues. Here’s how to troubleshoot them:
* **Streaks:** If you’re seeing streaks on your floors, it could be due to using too much soap or not wringing out your mop thoroughly enough. Try reducing the amount of soap you use and making sure your mop is damp, not soaking wet. Adding more rubbing alcohol can also help.
* **Residue:** If you’re seeing a residue on your floors, it could be due to using too much soap or not rinsing your mop frequently enough. Try reducing the amount of soap you use and rinsing your mop more often. You can also try mopping your floors with plain water to remove the residue.
* **Dullness:** If your floors are still looking dull after cleaning, it could be due to a buildup of wax or polish. You may need to strip the wax or polish from your floors before cleaning them with the DIY floor shine mix.
* **Sticky Floors:** Sticky floors are often caused by using too much soap or not rinsing properly. Try mopping with plain warm water to remove the sticky residue. Make sure to wring out your mop well.
* **Cloudy Floors:** Cloudy floors can be a sign of hard water. Try adding a little more vinegar to the cleaning solution to help cut through the mineral deposits. You can also use distilled water instead of tap water.
Safety First: Precautions to Keep in Mind
While this DIY floor shine mix is made with natural ingredients, it’s still important to take a few safety precautions:
* **Keep Out of Reach of Children and Pets:** Store the cleaning solution in a safe place, out of reach of children and pets.
* **Avoid Contact with Eyes:** Avoid contact with eyes. If the cleaning solution gets in your eyes, rinse them thoroughly with water.
* **Wear Gloves (Optional):** If you have sensitive skin, you may want to wear gloves while cleaning.
* **Ventilate the Room:** Open windows or turn on a fan to ventilate the room while you’re cleaning.
* **Don’t Mix with Other Cleaners:** Never mix this cleaning solution with other cleaners, as this could create harmful fumes.
Why I Love This DIY Floor Shine Mix
I’ve been using this DIY floor shine mix for years, and I absolutely love it! It’s effective, affordable, and environmentally friendly. Plus, it leaves my floors smelling fresh and clean without the harsh chemicals found in many commercial floor cleaners. I also love that I can customize the scent by using different essential oils. It’s a win-win!
So, there you have it – my secret recipe for a DIY floor shine mix that will have your floors looking their best. Give it a try, and let me know what you think! Happy cleaning!
Conclusion
So, there you have it! This simple, effective, and budget-friendly DIY floor shine mix is a game-changer for anyone looking to revitalize their floors without resorting to harsh chemicals or expensive commercial products. We’ve walked you through the easy steps, highlighting the benefits of each ingredient and demonstrating how they work together to create a brilliant, long-lasting shine.
Why is this DIY trick a must-try? Because it’s more than just a cleaning solution; it’s an investment in the longevity and beauty of your floors. Commercial floor cleaners often contain harsh chemicals that can strip away the finish over time, leaving your floors dull and susceptible to damage. Our DIY floor shine mix, on the other hand, uses gentle, natural ingredients that clean, protect, and enhance the natural luster of your floors. Plus, you likely already have most of the ingredients in your pantry!
Beyond the cost savings and eco-friendliness, this DIY approach allows you to customize the formula to suit your specific needs and preferences. For example, if you have particularly stubborn stains, you can add a bit more vinegar to the mix. If you prefer a stronger scent, you can experiment with different essential oils, such as lemon, lavender, or tea tree oil. Just remember to test any new additions on a small, inconspicuous area first to ensure they don’t damage your flooring.
Speaking of variations, consider the type of flooring you have. While this DIY floor shine mix is generally safe for most sealed hard floors, including hardwood, tile, laminate, and vinyl, it’s always best to err on the side of caution. For delicate surfaces like marble or unsealed wood, you may want to dilute the mixture further or consult with a flooring professional before proceeding. You can also create a specific mix for wood floors by adding a small amount of olive oil to the mix, which will help to nourish and protect the wood.
Another variation to consider is the application method. While we recommend using a microfiber mop for optimal results, you can also use a sponge mop or even a soft cloth. Just be sure to wring out the mop or cloth thoroughly to avoid leaving excess water on your floors. Excess water can seep into the seams and cause damage, especially on wood floors.
We are confident that once you try this DIY floor shine mix, you’ll be amazed by the results. Your floors will be cleaner, shinier, and more beautiful than ever before. But don’t just take our word for it – try it out for yourself!
We encourage you to give this DIY floor shine mix a try and share your experience with us. Let us know what variations you tried, what scents you used, and how it worked on your specific type of flooring. Your feedback is invaluable and will help us refine and improve this recipe for everyone. Share your before-and-after photos on social media using #DIYFloorShine and tag us so we can see your amazing results! We can’t wait to hear from you and see your sparkling floors!
Frequently Asked Questions (FAQ)
What types of floors is this DIY floor shine mix safe for?
This DIY floor shine mix is generally safe for most sealed hard floors, including hardwood, tile, laminate, and vinyl. However, it’s crucial to test the mixture on a small, inconspicuous area first to ensure it doesn’t damage your specific flooring. For delicate surfaces like marble or unsealed wood, it’s best to dilute the mixture further or consult with a flooring professional before proceeding. Always prioritize the manufacturer’s recommendations for your specific flooring type.
Can I use this DIY floor shine mix on hardwood floors?
Yes, you can use this DIY floor shine mix on hardwood floors, but with caution. Ensure your hardwood floors are properly sealed. For hardwood floors, consider adding a small amount of olive oil (about a tablespoon per gallon of water) to the mix. The olive oil will help to nourish and protect the wood, preventing it from drying out. Avoid using excessive amounts of water when cleaning hardwood floors, as this can cause warping or damage. Always wring out your mop thoroughly before applying the solution.
How often should I use this DIY floor shine mix?
The frequency of use depends on the amount of foot traffic and dirt your floors are exposed to. For high-traffic areas, you may need to use the mix once or twice a week. For less-trafficked areas, once every two weeks or even once a month may be sufficient. Observe your floors and adjust the frequency accordingly. Regular cleaning with this gentle DIY floor shine mix will help maintain their shine and prevent the buildup of dirt and grime.
Can I add essential oils to this DIY floor shine mix?
Yes, you can add essential oils to this DIY floor shine mix for a pleasant scent and added cleaning benefits. Lemon, lavender, tea tree, and eucalyptus oils are popular choices. Lemon oil has a refreshing scent and can help to cut through grease. Lavender oil has a calming aroma and antibacterial properties. Tea tree oil is a natural disinfectant. Eucalyptus oil has a refreshing scent and can help to repel insects. Add a few drops of your favorite essential oil to the mix, but avoid using too much, as some essential oils can be irritating to sensitive skin or harmful to pets. Start with 5-10 drops per gallon of water and adjust to your preference.
What if I don’t have all the ingredients listed in the recipe?
The core ingredients for this DIY floor shine mix are water, vinegar, and dish soap. If you’re missing one of the optional ingredients, such as rubbing alcohol or essential oils, you can still use the mix without them. The vinegar and dish soap will provide the primary cleaning power. The rubbing alcohol helps the solution dry faster and prevents streaks, while the essential oils add a pleasant scent and additional cleaning benefits. If you don’t have rubbing alcohol, you can simply ensure you wring out your mop thoroughly to minimize streaks.
Will this DIY floor shine mix leave streaks on my floors?
To minimize streaks, it’s important to use a clean microfiber mop and wring it out thoroughly before applying the solution to your floors. Avoid using excessive amounts of water, as this can contribute to streaking. If you’re still experiencing streaks, try adding a small amount of rubbing alcohol to the mix, which will help the solution dry faster. You can also try buffing your floors with a dry microfiber cloth after cleaning to remove any remaining streaks.
Is this DIY floor shine mix safe for pets and children?
This DIY floor shine mix is generally safer for pets and children than commercial floor cleaners, as it uses natural ingredients. However, it’s still important to exercise caution. Keep pets and children away from the area while you’re cleaning and until the floors are completely dry. If you’re using essential oils, choose pet-friendly options and avoid using excessive amounts. Always store the DIY floor shine mix out of reach of children and pets.
How should I store the leftover DIY floor shine mix?
Store any leftover DIY floor shine mix in a clean, airtight container. Label the container clearly to avoid confusion. Keep the container out of reach of children and pets. The mix should be stable for several weeks, but it’s best to use it within a month for optimal results. If the mix starts to look cloudy or develop an unusual odor, discard it and make a fresh batch.

Leave a Comment