
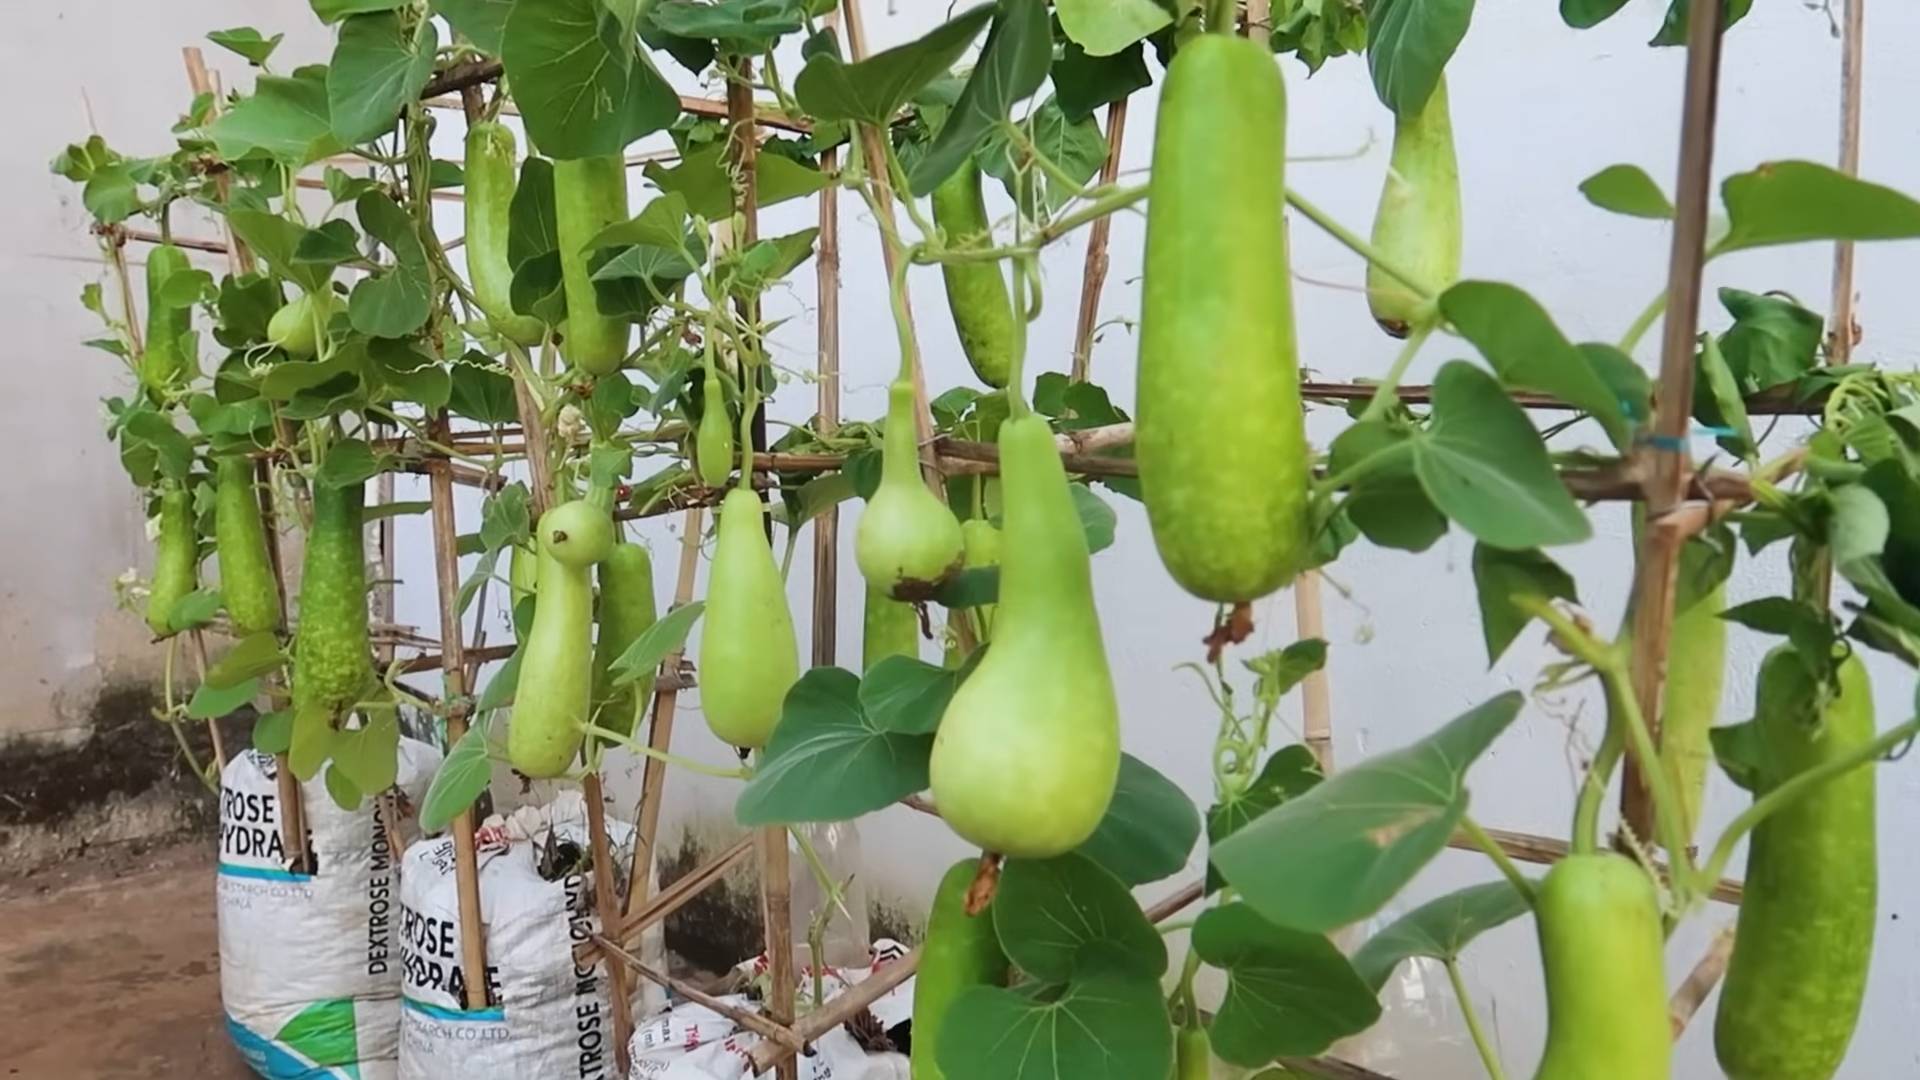
Growing Gourds in Bags: Unlock the secrets to a bountiful harvest, even without a sprawling garden! Have you ever dreamed of adorning your home with unique, handcrafted decorations, all grown right in your backyard? Or perhaps you’re simply looking for a fun and rewarding gardening project that doesn’t require acres of land? Well, you’re in the right place! This DIY guide will show you how to cultivate beautiful, thriving gourds using a surprisingly simple and effective method: growing them in bags.
Gourds have a rich history, stretching back centuries. They’ve been used for everything from utensils and musical instruments to art and decoration across various cultures. Think of the iconic gourd rattles of indigenous tribes or the intricately carved gourd bowls of African artisans. Today, gourds continue to captivate us with their unique shapes and versatility.
But let’s face it, traditional gourd cultivation can be challenging. They often require a lot of space and specific soil conditions. That’s where this DIY trick comes in! Growing Gourds in Bags offers a practical solution for urban gardeners, apartment dwellers, or anyone with limited space. I’m going to show you how to bypass the usual challenges and enjoy a thriving gourd harvest, no matter where you live. Get ready to unleash your inner artist and create something truly special, all while enjoying the satisfaction of growing your own beautiful gourds!
Growing Gourds in Bags: A DIY Guide for Bountiful Harvests
Hey there, fellow gardening enthusiasts! I’m so excited to share my experience with growing gourds in bags. It’s a fantastic method, especially if you’re short on space or have challenging soil conditions. Trust me, you’ll be amazed at the results! Let’s dive in!
Why Grow Gourds in Bags?
Before we get started, let’s quickly touch on why this method is so great:
* Space Saving: Perfect for balconies, patios, or small gardens.
* Soil Control: You can create the ideal growing medium for your gourds.
* Portability: Move your gourds to the sunniest spot as needed.
* Reduced Weeds: Bags help minimize weed growth.
* Better Drainage: Prevents root rot, a common gourd problem.
Materials You’ll Need
Alright, let’s gather our supplies. Here’s what you’ll need to get started:
* Gourd Seeds: Choose your favorite variety! I personally love growing birdhouse gourds and dipper gourds.
* Large Grow Bags: I recommend using bags that are at least 20 gallons in size. Fabric grow bags are ideal because they allow for good drainage and aeration.
* Potting Mix: A high-quality potting mix is crucial. Look for one that’s well-draining and contains plenty of organic matter.
* Compost: Compost adds essential nutrients and improves soil structure.
* Slow-Release Fertilizer: This will provide your gourds with a steady supply of nutrients throughout the growing season.
* Trellis or Support System: Gourds are vines, so they need something to climb on. A sturdy trellis, fence, or even a DIY support structure will work.
* Watering Can or Hose: For regular watering.
* Gardening Gloves: To protect your hands.
* Hand Trowel: For planting.
* Pruning Shears: For trimming vines as needed.
Step-by-Step Instructions: From Seed to Sprout
Okay, let’s get our hands dirty! Here’s how to grow gourds in bags, step by step:
1. Starting Your Seeds (Optional)
You can directly sow gourd seeds into the grow bags, but I prefer to start them indoors a few weeks before the last expected frost. This gives them a head start.
1. Prepare Seed Starting Trays: Fill seed starting trays with a seed starting mix.
2. Sow Seeds: Plant 2-3 seeds per cell, about 1 inch deep.
3. Water Gently: Water the trays gently to moisten the soil.
4. Provide Warmth: Place the trays in a warm location or use a heat mat to encourage germination.
5. Provide Light: Once the seedlings emerge, provide them with plenty of light. A sunny windowsill or grow lights will work.
6. Thin Seedlings: Once the seedlings have a few true leaves, thin them to one strong seedling per cell.
2. Preparing Your Grow Bags
This is a crucial step for success!
1. Choose a Location: Select a sunny location that receives at least 6-8 hours of direct sunlight per day.
2. Place Grow Bags: Place your grow bags in the chosen location. Remember, once they’re filled with soil, they’ll be heavy, so it’s best to put them where they’ll stay.
3. Prepare Soil Mix: In a large container or wheelbarrow, mix together the potting mix, compost, and slow-release fertilizer. I usually use a ratio of 2 parts potting mix, 1 part compost, and follow the fertilizer instructions on the package.
4. Fill Grow Bags: Fill the grow bags with the prepared soil mix, leaving a few inches of space at the top.
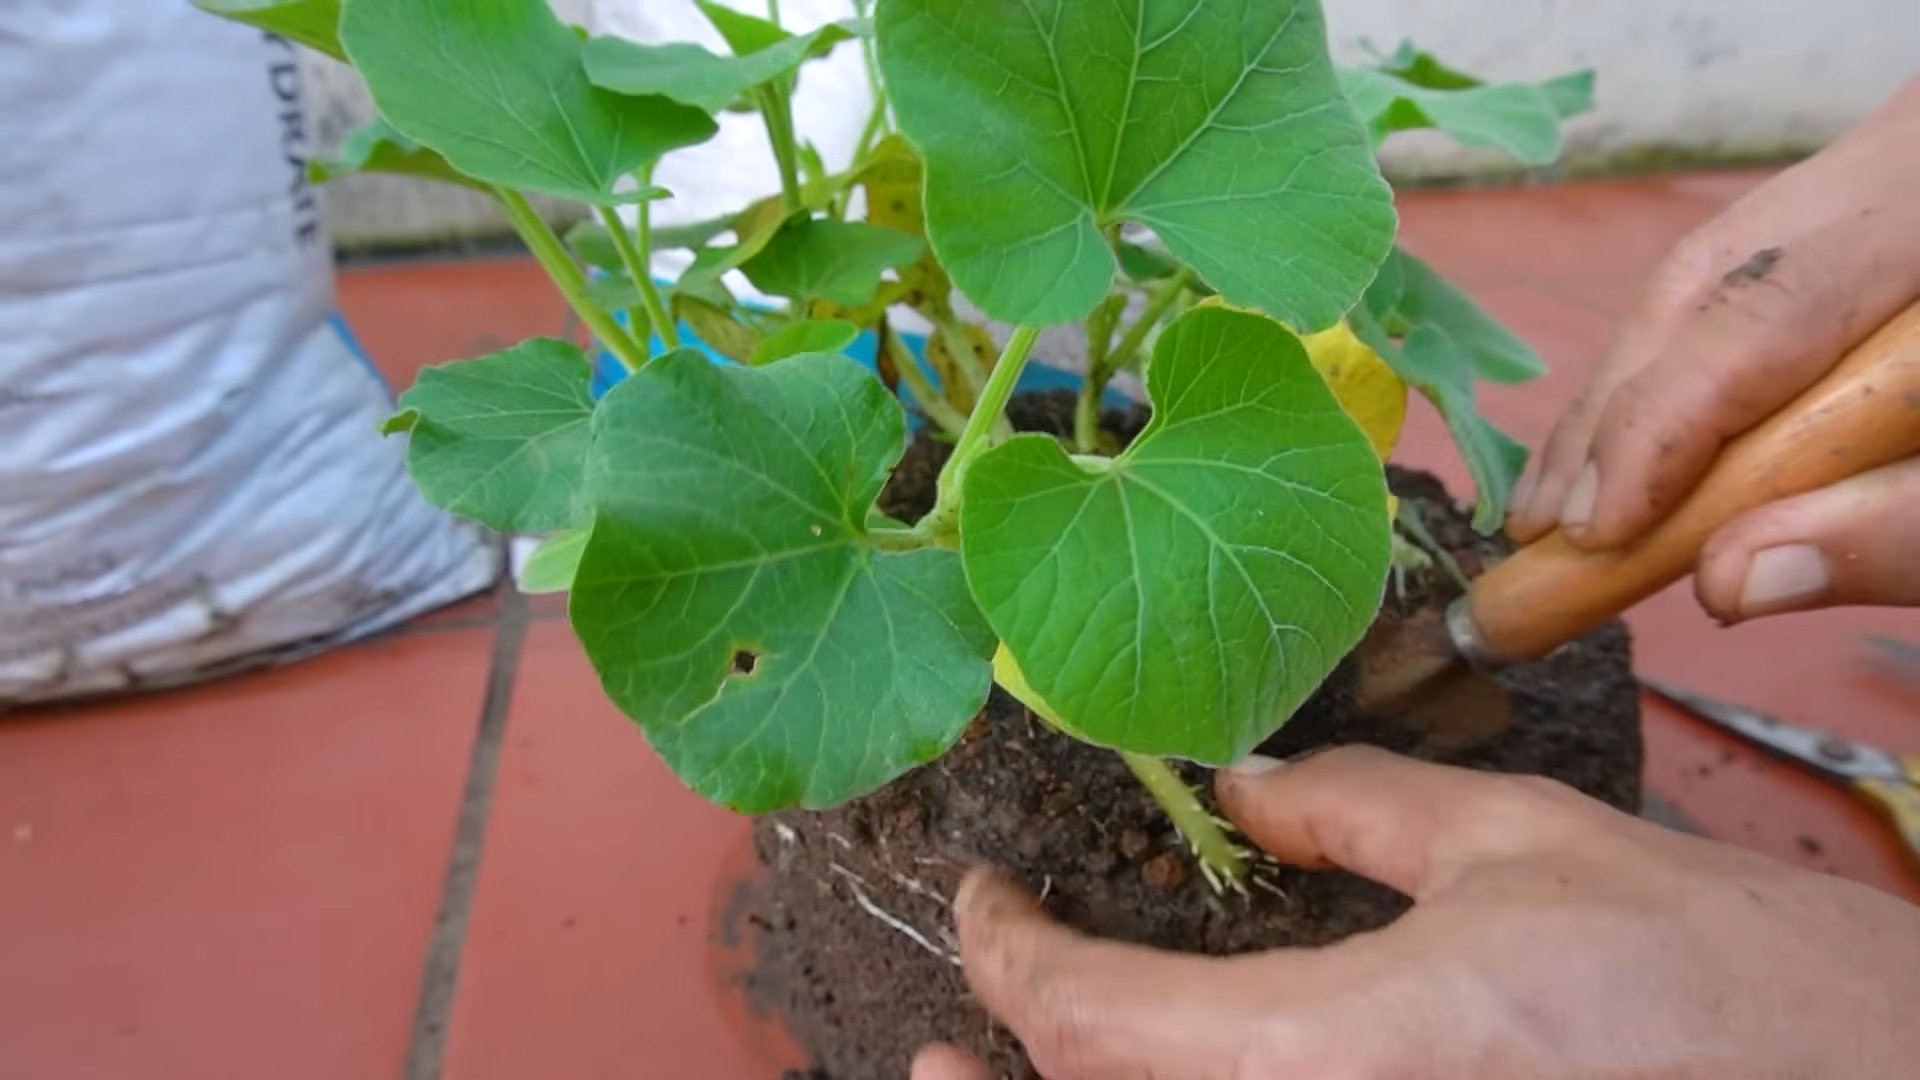
3. Planting Your Gourd Seedlings (or Seeds)
Now for the fun part!
1. Create Planting Holes: Dig a hole in the center of each grow bag, large enough to accommodate the root ball of your seedling (or the seeds).
2. Plant Seedlings: Gently remove the seedlings from the seed starting trays and place them in the planting holes. If you’re directly sowing seeds, plant 2-3 seeds per hole, about 1 inch deep.
3. Cover Roots: Cover the roots with soil and gently firm the soil around the base of the plant.
4. Water Thoroughly: Water the newly planted seedlings (or seeds) thoroughly.
4. Setting Up Your Trellis or Support System
Gourds are climbers, so they need a sturdy support system.
1. Install Trellis: Install your trellis or support system behind the grow bags. Make sure it’s strong enough to support the weight of the mature gourd vines and fruits.
2. Guide Vines: As the gourd vines grow, gently guide them onto the trellis. You may need to tie them to the trellis with soft twine or plant ties.
Maintaining Your Gourd Plants: A Little TLC Goes a Long Way
Now that your gourds are planted, it’s time to provide them with the care they need to thrive.
1. Watering
* Water Regularly: Gourds need consistent moisture, especially during hot weather. Water deeply whenever the top inch of soil feels dry to the touch.
* Avoid Overwatering: Overwatering can lead to root rot, so make sure the grow bags have good drainage.
* Water in the Morning: Water in the morning to allow the foliage to dry before nightfall, which can help prevent fungal diseases.
2. Fertilizing
* Side-Dress with Compost: Every few weeks, side-dress your gourd plants with compost to provide them with extra nutrients.
* Liquid Fertilizer: You can also supplement with a liquid fertilizer, such as fish emulsion or seaweed extract, every 2-3 weeks.
3. Pruning
* Prune Vines: Prune the vines as needed to control their growth and encourage fruit production. You can pinch off the tips of the vines to promote branching.
* Remove Yellowing Leaves: Remove any yellowing or diseased leaves to prevent the spread of disease.
4. Pest and Disease Control
* Monitor for Pests: Keep an eye out for common gourd pests, such as squash bugs, squash vine borers, and aphids.
* Organic Pest Control: Use organic pest control methods, such as insecticidal soap or neem oil, to control pests.
* Prevent Fungal Diseases: To prevent fungal diseases, provide good air circulation around the plants and avoid overhead watering.
* Treat Diseases Promptly: If you notice any signs of disease, such as powdery mildew or downy mildew, treat them promptly with an appropriate fungicide.
5. Pollination
* Hand Pollination (If Needed): Gourds have separate male and female flowers. If you’re not seeing many gourds developing, you may need to hand-pollinate the flowers.
* Identify Male and Female Flowers: Male flowers have a long, slender stem, while female flowers have a small gourd-like structure at the base.
* Pollinate in the Morning: In the morning, use a small paintbrush or cotton swab to transfer pollen from the male flower to the female flower.
Harvesting and Curing Your Gourds: The Final Step
After all your hard work, it’s time to harvest your gourds!
1. Harvesting
* Harvest When Mature: Harvest gourds when they are fully mature and the stems have turned brown and dry.
* Leave a Stem: Cut the gourds from the vine, leaving a few inches of stem attached.
* Handle Carefully: Handle the gourds carefully to avoid bruising or damaging them.
2. Curing
Curing is essential for preserving your gourds.
1. Clean Gourds: Wash the gourds with soapy water to remove any dirt or debris.
2. Dry Thoroughly: Dry the gourds thoroughly with a clean cloth.
3. Provide Air Circulation: Place the gourds in a well-ventilated area, such as a garage or shed, where they will be protected from rain and direct sunlight.
4. Elevate Gourds: Elevate the gourds on racks or pallets to allow for good air circulation.
5. Turn Regularly: Turn the gourds regularly to ensure even drying.
6. Curing Time: The curing process can take several weeks or even months, depending on the size and thickness of the gourds.
7. Check for Rot: Check the gourds regularly for signs of rot. Discard any gourds that show signs of rot.
8
Conclusion
So, there you have it! Growing gourds in bags is not just a viable option; it’s a game-changer for gardeners with limited space, challenging soil, or a desire for greater control over their growing environment. We’ve explored the ins and outs of this method, highlighting its advantages and providing a step-by-step guide to ensure your success.
Why is this DIY trick a must-try? Because it unlocks the potential for a bountiful gourd harvest, regardless of your gardening limitations. Imagine vibrant, healthy gourds adorning your porch or transformed into unique crafts, all thanks to a simple, adaptable technique. This method allows you to precisely control the soil composition, ensuring your gourds receive the nutrients they need to thrive. It also offers superior drainage, preventing root rot and other common gourd-growing problems. Furthermore, the portability of bags means you can easily move your gourds to chase the sun or shelter them from harsh weather.
But the beauty of growing gourds in bags lies in its adaptability. Feel free to experiment with different gourd varieties. Luffa gourds, with their sponge-like interiors, are fantastic for creating natural scrubbers. Bottle gourds can be dried and transformed into birdhouses, dippers, or musical instruments. Ornamental gourds, with their diverse shapes and colors, add a touch of whimsy to any fall display.
Consider variations in your soil mix as well. While the recommended blend of compost, potting soil, and perlite works well, you can tailor it to your specific gourd variety’s needs. For example, adding a bit of bone meal can provide extra phosphorus, promoting strong root development and abundant flowering. You can also experiment with different types of bags. While grow bags are ideal due to their breathability, sturdy burlap sacks or even repurposed feed bags can work in a pinch. Just ensure they have adequate drainage holes.
Don’t be afraid to get creative with your support system. While a trellis is a common choice, you can also use sturdy stakes, fences, or even existing structures to provide vertical support for your growing gourds. The key is to ensure the support is strong enough to handle the weight of the mature gourds.
Ultimately, the success of growing gourds in bags hinges on your willingness to experiment and adapt. Observe your plants closely, paying attention to their growth habits, leaf color, and overall health. Adjust your watering and fertilization schedule as needed. And most importantly, don’t be discouraged by setbacks. Gardening is a learning process, and every experience, whether successful or not, provides valuable insights.
We are confident that you’ll find growing gourds in bags to be a rewarding and enjoyable experience. So, grab your supplies, get your hands dirty, and embark on this exciting gardening adventure. We encourage you to try this **DIY gourd growing** method and share your experiences with us! Post photos of your gourd-filled bags, share your tips and tricks, and let us know what you’ve learned. Together, we can create a community of gourd-growing enthusiasts, sharing our knowledge and inspiring others to discover the joys of this unique and versatile plant. Happy growing!
Frequently Asked Questions (FAQ)
What size bag is best for growing gourds?
The ideal bag size depends on the gourd variety you’re growing. For smaller ornamental gourds, a 10-gallon bag may suffice. However, for larger varieties like bottle gourds or luffa gourds, a 20-gallon or even a 30-gallon bag is recommended. The larger the bag, the more room the roots have to grow, resulting in a healthier and more productive plant. Ensure the bag is sturdy enough to support the weight of the mature plant and its gourds.
What kind of soil should I use in the bags?
A well-draining and nutrient-rich soil mix is crucial for successful gourd growing. A good starting point is a blend of equal parts compost, potting soil, and perlite. Compost provides essential nutrients and improves soil structure, potting soil offers good drainage and aeration, and perlite enhances drainage and prevents soil compaction. You can also add a slow-release fertilizer to the mix to provide a steady supply of nutrients throughout the growing season. Avoid using garden soil directly in the bags, as it can be too heavy and poorly draining.
How often should I water my gourds grown in bags?
Watering frequency depends on several factors, including the weather, the size of the bag, and the gourd variety. Generally, you should water your gourds whenever the top inch of soil feels dry to the touch. During hot, dry weather, you may need to water daily or even twice a day. Ensure the water drains freely from the bottom of the bag to prevent waterlogging. Overwatering can lead to root rot, so it’s always better to err on the side of underwatering.
Do gourds grown in bags need fertilizer?
Yes, gourds are heavy feeders and benefit from regular fertilization. Start with a slow-release fertilizer incorporated into the soil mix at planting time. Then, supplement with a liquid fertilizer every two to three weeks throughout the growing season. Choose a fertilizer that is high in phosphorus and potassium, as these nutrients are essential for flowering and fruit development. Avoid over-fertilizing, as this can lead to excessive foliage growth at the expense of fruit production.
How do I support the gourds as they grow in bags?
Gourds are vining plants and require support to grow properly. A trellis is a common choice, but you can also use sturdy stakes, fences, or even existing structures. The key is to ensure the support is strong enough to handle the weight of the mature plant and its gourds. Train the vines to climb the support as they grow, and tie them loosely with twine or plant ties if needed.
What are some common pests and diseases that affect gourds grown in bags?
Common pests that can affect gourds include squash bugs, squash vine borers, and aphids. Regularly inspect your plants for signs of infestation and take appropriate action, such as hand-picking pests, using insecticidal soap, or applying neem oil. Common diseases include powdery mildew and downy mildew. To prevent these diseases, ensure good air circulation around the plants, avoid overhead watering, and apply a fungicide if necessary.
Can I grow gourds in bags indoors?
While it’s possible to grow gourds in bags indoors, it’s challenging due to the plant’s need for ample sunlight and space. If you choose to grow gourds indoors, provide them with at least six to eight hours of direct sunlight per day, or supplement with grow lights. You’ll also need a large enough space to accommodate the vining growth habit of the plant. Indoor gourd growing is best suited for smaller ornamental varieties.
How long does it take for gourds to mature when grown in bags?
The time it takes for gourds to mature depends on the variety and growing conditions. Generally, gourds take between 90 and 120 days to mature. You’ll know your gourds are ready to harvest when the stems begin to dry and turn brown. The skin of the gourd should also be hard and resistant to scratching.
Can I reuse the soil in the bags for growing gourds next year?
While you can reuse the soil in the bags, it’s best to amend it with fresh compost and fertilizer before planting again. This will replenish the nutrients that were depleted during the previous growing season. You can also sterilize the soil by baking it in the oven or solarizing it in the sun to kill any potential pests or diseases.
What are the benefits of growing gourds in bags compared to growing them in the ground?
Growing gourds in bags offers several advantages over growing them in the ground. It allows you to control the soil composition, ensuring your gourds receive the nutrients they need to thrive. It also provides better drainage, preventing root rot. The portability of bags means you can easily move your gourds to chase the sun or shelter them from harsh weather. Additionally, growing in bags can help to prevent soilborne pests and diseases from affecting your plants. Finally, it’s an excellent option for gardeners with limited space or challenging soil conditions.
Leave a Comment